Once you’ve discovered the OVM server, created a server pool and repository, you should download and import an OVM template. Once you have a OVM template, you can started creating new VMs from the existing VM template as explained in this article
Note: For additional information, refer to all our Oracle VM articles.
1. Clone Virtual Machine Template
Login to OVM Manager, go to “Servers and VMs” tab, select “Server Pools”, and select your severpool (for example: ovm1pool), which will list all the available VMs (including the VM template) in the right side panel.
Select the appropriate VM template that you imported earlier, and click on the “Clone or Move Virtual Machine” icon from the toolbar.
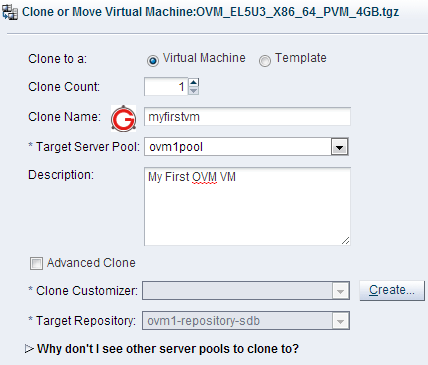
This will launch the following clone or move VM dialogue, where you have to enter these information:
Clone to a: Select VM
Clone Count: Leave at default 1
Clone Name: Give the name of your VM
Target Server Pool:
Desc:

2. View Clone Job Summary
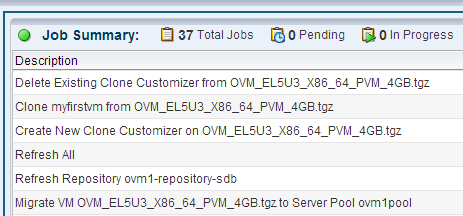
While the clone is running, you can see the current status of the clone from the “Job Summary” located at the bottom panel as shown below.

3. View New VM Details
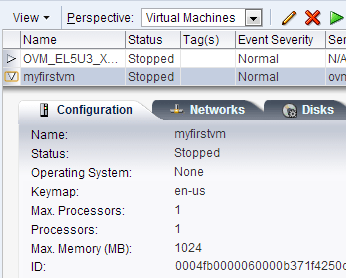
Once the VM is created from the VM template, you can view the summary details of the created VM as shown below.

4. Assign Network Info to the new VM
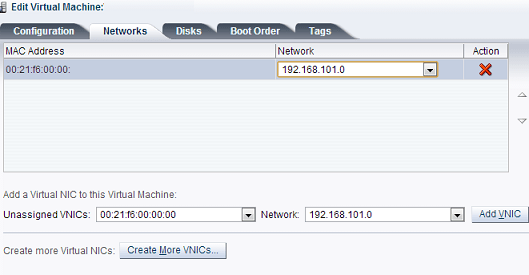
After the VM is created from the clone, select the VM and click on the “Edit” icon from the toolbar, which will display the following screen. From here make sure this VM has a VNIC and it is assigned to the network. If not, make sure you create new VNIC and assign it ot a network. Without this step, you’ll not be able to connect to the VM.

Finally, you can start the VM and login to the OS.