Instead of installing the OS from a CD to your virtual machine, you can also use one of the pre-existing OS OVM templates. From the Oracle eDelivery site, select the product as “Oracle VM”, and browse to the “Templates” section. From here, you’ll see OVM templates for lot of operating systems.
The idea here is that you first import the OVM template to the VM Manager, then using the OVM template, you can create the VM anytime you want it.
In my case, I downloaded the “Oracle Enterprise Linux 5 Update 3” 64-bit template. The file for this template is: OVM_EL5U3_X86_64_PVM_4GB.tgz. In your case, you should download it for your operating system and processor type (i.e 32-bit or 64-bit).
The best way to import an OVM template is to put it on some webserver, or ftp server, and use that URL from Oracle VM Manager to import it as explained below.
Note: For additional information, refer to all our Oracle VM articles.
Before you do this, from the OVM Manager, make sure you have discovered the OVM server, created server pool and created a repository.
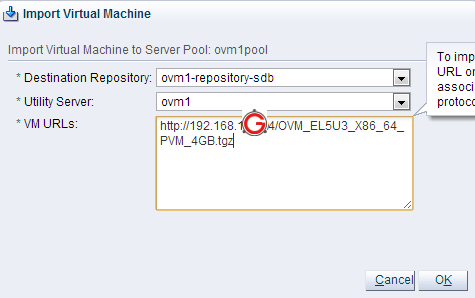
Login to OVM Manager, go to “Servers and VMs” tab, select “Server Pools”, and click on “Import Virtual Machine” icon from the toolbar as shown below.
Enter the following information in this screen, and click on next.
Destination Repository: This is the disk repository that was created earlier.
Utility Server: This is the OVM server name
VM URLs: The URL where you put the OVM template file.

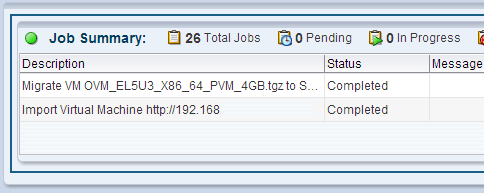
Once the import started, it will first copy the VM template from the given web server URL to the VM manager, and then install that template on the VM server. Once the installation is done, you can see the status of the job at the bottom of the screen in the “Job Summary” section as shown below.

Now that you have imported the OVM template, you can started creating new VM using this OVM template. In our next article in this series, we’ll discuss how to create a new VM from the template.