Once you’ve downloaded the latest stable version of Oracle VM Server from Oracle’s website, burn it in a DVD as ISO image. In this tutorial, I’m using Oracle VM Server 3.2.2. But, it is pretty much similar for other versions.
1. Initial Screen
Make sure to set your system BIOS to boot from CD/DVD if you already have some other OS on the system, and you are planning to erase that and install OVM.
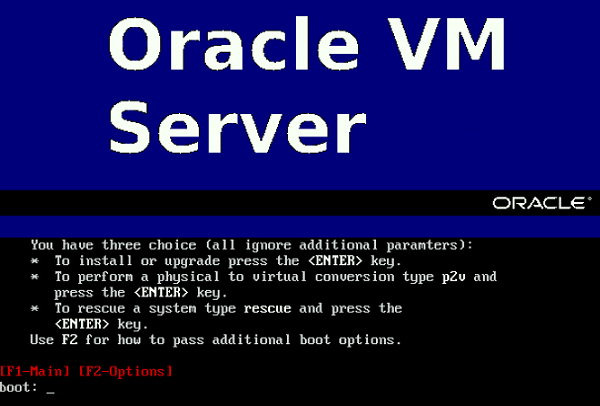
In the initial screen, press ENTER to continue.
2. Keyboard Selection and OVS EULA
- Next, you’ll get the testing the CD media confirmation box. Select “Skip” to just skip the CD testing process, which normally takes some time. We don’t want to wait for that.
- Select “us” in the Keyboard Selection screen.
- In the OVS EULA screen, select “Accept”
3. Partition Type
This screen will display all the available disks on your system. This will also show any SAN storage that is connected to the system.
In the following example, it shows sda and sdb, which are internal drives on the system. I choose sda, as that is where I want to install the Oracle VM Server.
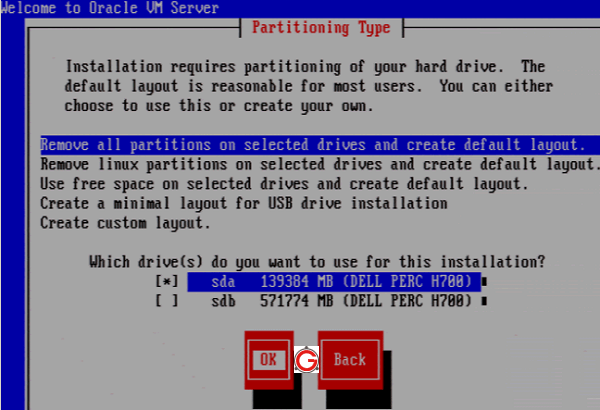
IMPORTANT: Please note that Oracle VM Server will take the entire hard drive (i.e the whole /dev/sda), you cannot install OVM Server on a partition. So, if possible, try to have a small size disk for /dev/sda, as you don’t want to waste a big size disk for the OVM server.
Next, you’ll get a warning message saying it will erase all the data on the /dev/sda. Ofcourse, say “Yes” only if you want everything to be gone from this disk, and you want to install OVM server on that disk.
4. Boot Loader Configuration
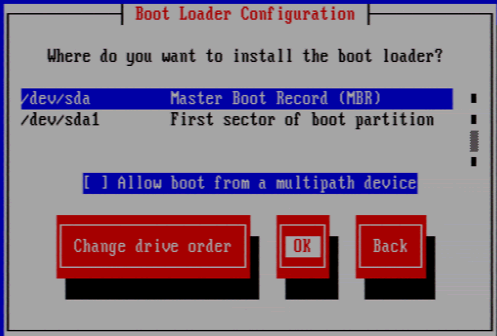
This will ask you where you want to install the boot loader configuration. Select the “/dev/sda”, which is the default as shown below.
5. Choose Network Interface
This will display all the available Ethernet ports on the system. Choose the first one, i.e eth0. Unless you have a reason to choose others.
Choose the network interface to use for management of this machine.

eth0: aa:bb:cc:dd:ee:00
eth1: aa:bb:cc:dd:ee:01
eth2: aa:bb:cc:dd:ee:02
eth3: aa:bb:cc:dd:ee:03
6. Specify Ip-Address
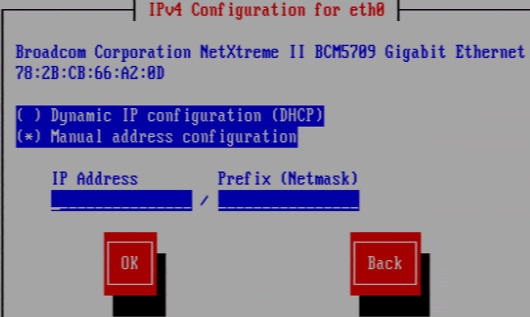
In the IPv4 configuration for eth0, select “Manual address configuration” and specify the ip-address and netmask (for example: 192.168.1.1 and /24) you want to use for this OVM server.
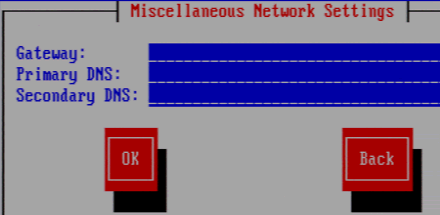
7. Gateway and DNS settings
Next specify the gateway, primary and secondary DNS settings for the OVM server.
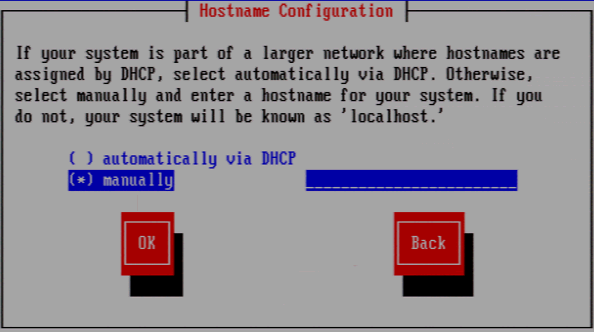
8. Specify Host Name
Next, specify the host-name of the OVM server (for example: ovmdev)
Next, select the time-zone from the list. In my case, I selected “America/Los_Angeles”
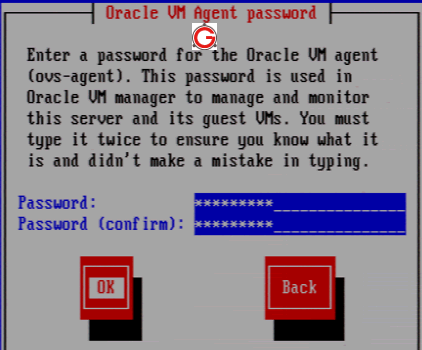
9. Oracle VM Agent Password
Specify the password for the OVM Agent. Don’t forget this password. You’ll need this later to manage this server.
Next, it will ask you for Root password. Please note that root password is for the OVM server itself (i.e Linux OS). This is different than the above OVM agent password. Remember both of these passwords.
Click Ok, on the “Begin Installation” confirmation screen.
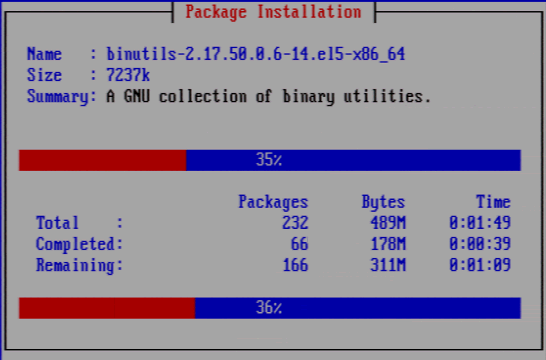
10. Install in progress
This will first transfer the install image from the DVD to the hard disk, and display the progress screen as shown below.
11. OVM Installation Completed
Once the installation is done, it will prompt you with a reboot message. Select “Reboot”. You’ll see the following screen. Press Alt-F2, from where you can use the root username and password to login to the Oracle OVM server.
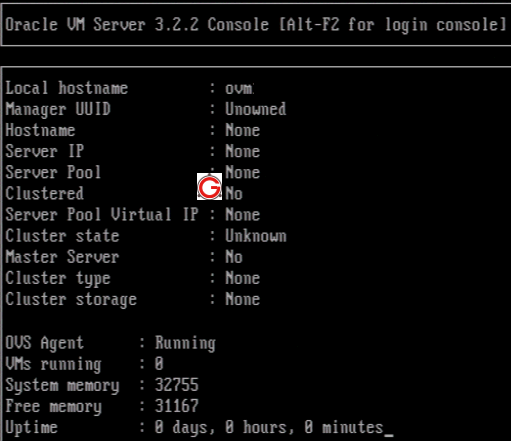
Now, you can manage this server from the Oracle VM Manager console.
We’ll be publishing more articles on OVM on an on-going basis. If you have any specific questions about OVM, leave a comment below.
Comments on this entry are closed.