Oracle VM Server Discovery is a process by which, the OVM Manager finds one or more OVM servers in your environment, and adds it to the manager repository for administration activities.
First, install an Oracle VM Server. You might end-up installing several Oracle VM servers on your environment.
To manage all these OVM servers, you need to install Oracle VM Manager.
Once you’ve installed the OVM Manager, you can discover all the Oracle VM servers in your environment as shown below.
1. Discover OVM Server
Login to OVM Manager, go to “Servers and VMs” Tab, and click on the “Discover Servers” icon from the toolbar.

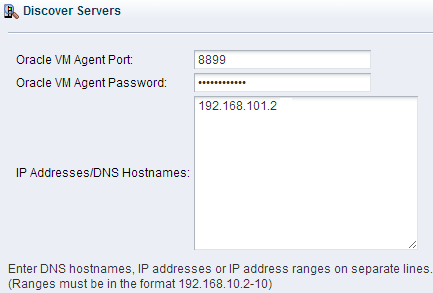
This will launch the following discover server screen. Enter the following information here:
Oracle VM Agent Port: Default is 8899
Oracle VM Agent Password
IP Address of the OVM server

Once it discovers the server, it will display the message in the status bar. If it can’t discover, it will display error message here.
2. Unassigned Server
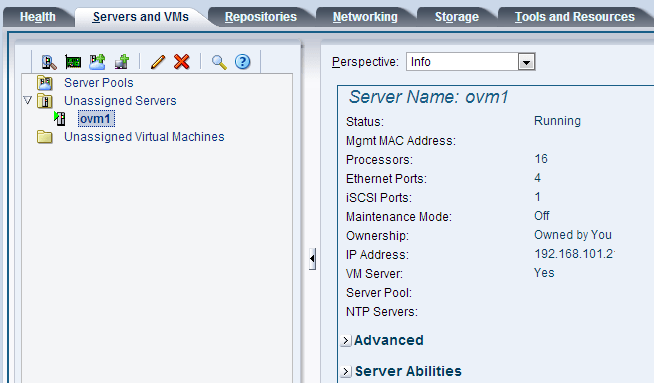
Now the discovered server will be listed under the “Unassigned Server” tree node as shown below. In this case, it discovered the server called ovm1.
Click on the ovm1 server to see more details about this Oracle VM server.

You can also expand “Advanced” and “Server Abilities” to see more information about this server.
3. Create Virtual NICs
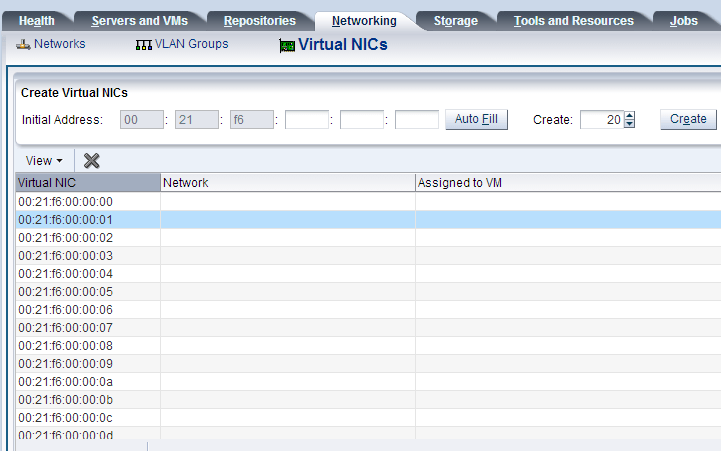
If this is the 1st time you are discovering an OVM server, you should create vNICs. Go to “Networking” tab, You’ll not see any virtual NICs listed here.
Click on “Create”, it will create 20 Virtual NICs based on the criteria mentioned here.
